Symmetry
GD&T Symbol: 
Relative to Datum: Yes
MMC or LMC applicable: No
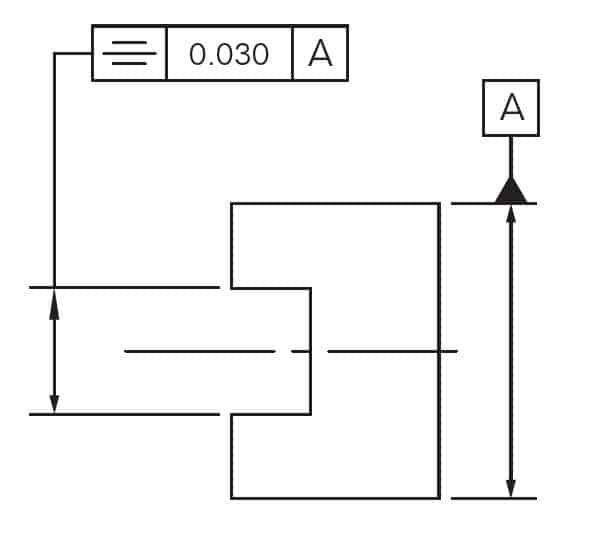
Drawing Callout:
Description:
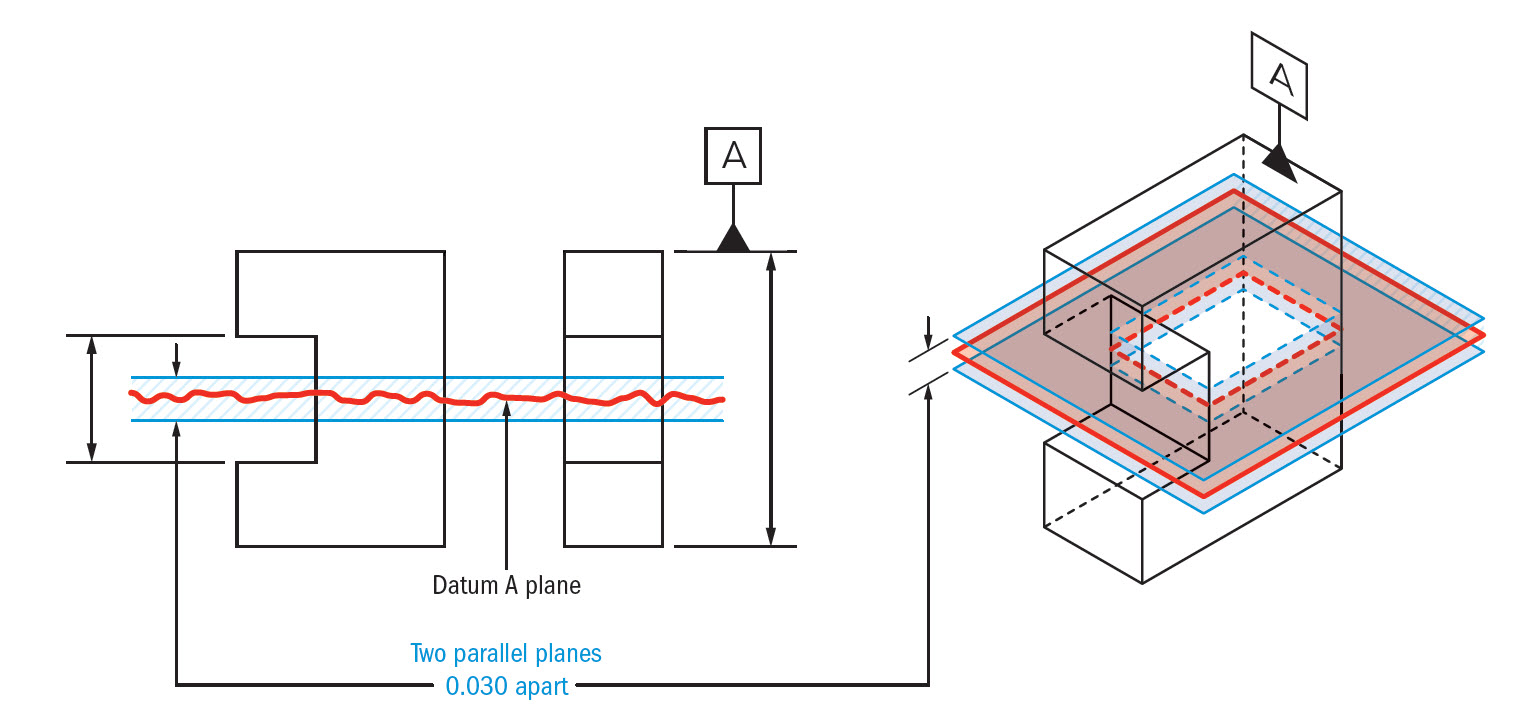
GD&T Symmetry is a 3-Dimensional tolerance that is used to ensure that two features on a part are uniform across a datum plane. An established “true” central plane is established from the datum and for the symmetry to be in tolerance, the median distance between every point on the two surface features needs to fall near that central plane. Each set of points on the reference features would have a midpoint that is right between the two. If you take all the midpoints of the entire surface, this must lie within the tolerance zone to be in specification. Symmetry is not a very common Geometric Dimensioning and Tolerancing callout since it has very limited functional uses (centering location is done with Position) and the verification and measurement of symmetry can be difficult (See: Final Notes).
GD&T Tolerance Zone:
Parallel Planes on equal sides of a central datum plane. The median points of the symmetrical surfaces must all lie within this zone.
Gauging / Measurement:
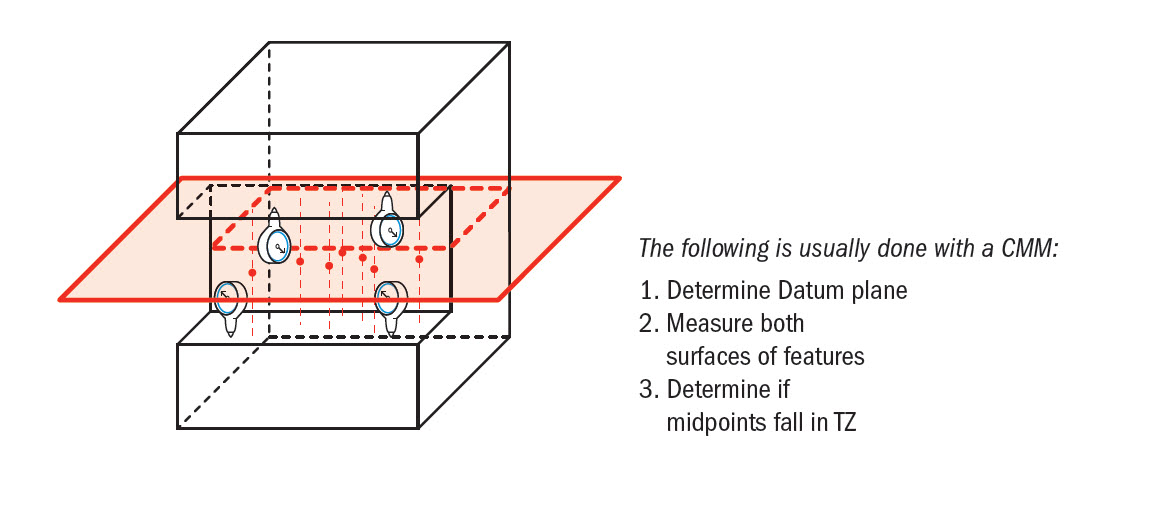
As stated before, symmetry is very difficult to measure. Due to its tolerance zone being constrained to a virtual plane, you cannot have a gauge to properly measure this feature quickly. Usually, to measure symmetry, a CMM is set up to calculate the theoretical midpoint datum plane, measure the surfaces of both required surfaces, and then determine where the midpoints lie in reference to the datum plane. This is a complex and sometimes inaccurate method for determining if a part is symmetrical.
Relation to Other GD&T Symbols:
Symmetry is the non-circular version of concentricity. While concentricity really is a focus of symmetry around a datum axis, The Symmetry Symbol is a focus on symmetry over a datum plane. Both symbols focus on the theoretical center datum being constrained within a specific limit to ensure that the entire structure is uniform.
When Used:
When you want to make sure that the center plane of two symmetric features is always held exactly center AND has even form along the surface of the part. This symbol only has specific uses for mass balance and form distribution. However, in most cases it is better to avoid using since this is a very difficult callout to measure and can easily be replaced with a Position tolerance.
Example:
If you had a rotating U-Joint, a groove that needed to always have even balance, you would need to make sure that the mating part is always located to fall into the center of the groove and that the surface form is properly balanced… Instead of widening the groove causing the conncetion to be loose, you could constrain it with symmetry.
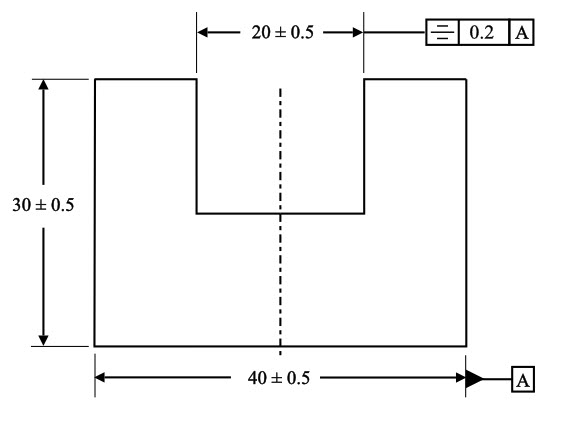
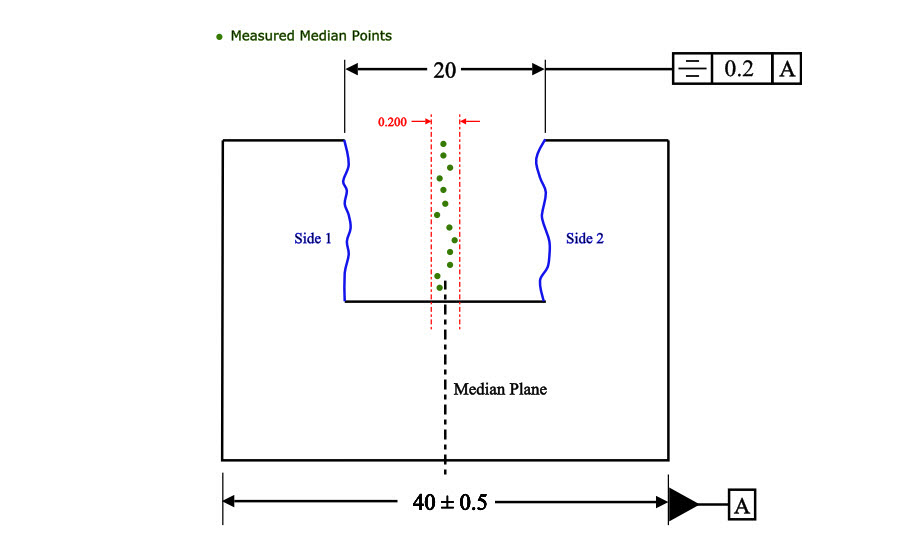
Symmetry Example 1: Call out symmetry to ensure the groove is centered on the median plane of the latch block.
The part would then need to be measured to ensure that all the median points of the sides of the latch block are symmetrical about the central axis. The part would have to be measured in the following way:
- Measure the width and location of both sides of the block reference by datum A (40mm) and determine where the exact median plane is located to establish our tolerance zone.
- Side 1 and Side 2 of the part are scanned for their actual profiles
- Using a program, the median points of the Side 1 and Side 2 scans are laid over the virtual tolerance zone planes and determined if they are in tolerance.
Final Notes:
Symmetry should be avoided in most cases due to its specific functional requirements and measurement difficulty. With flatness, parallelism and true position, you can locate the exact same constraints on the part, albeit with more callouts and measurements required. However since true position can be measured with a gauge (if MMC is used), and flatness is automatically controlled by the size dimension & directly measured off the surfaces, these can be controlled within a process and do not require timely CMM measurements.
