Runout
GD&T Symbol: 
Relative to Datum: Yes
MMC or LMC applicable: No
Drawing Callout:

Description:
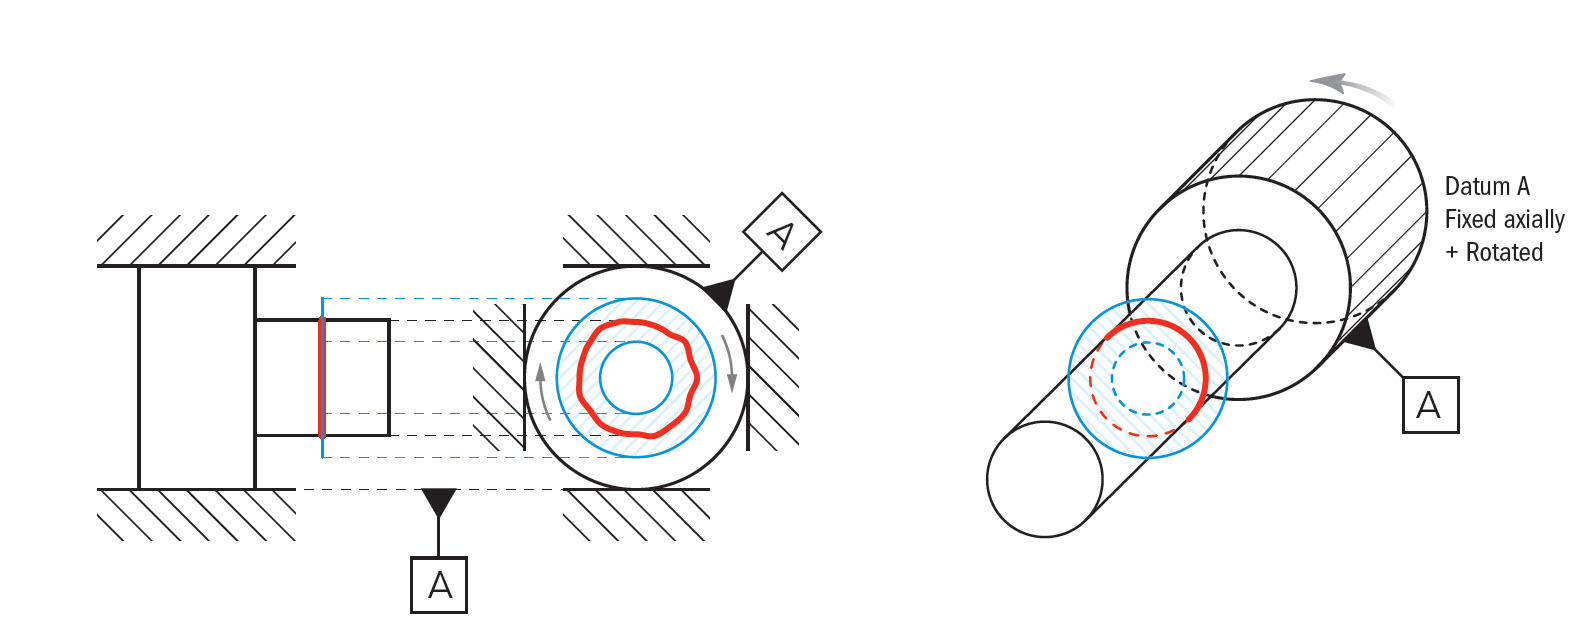
Runout is how much one given reference feature or features vary with respect to another datum when the part is rotated 360° around the datum axis. It is essentially a control of a circular feature, and how much variation it has with the rotational axis. Runout can be called out on any feature that is rotated about an axis. It is essentially how much “wobble” occurs in the one part feature when referenced to another.
GD&T Tolerance Zone:
2-Dimensional circular tolerance zone that is defined by a datum axis where all points on the called surface must fall into. The zone is a direct reference to the datum feature. Runout is the total variation that the reference surface can have when the part is rotated around the datum’s true axis.

Gaging / Measurement:
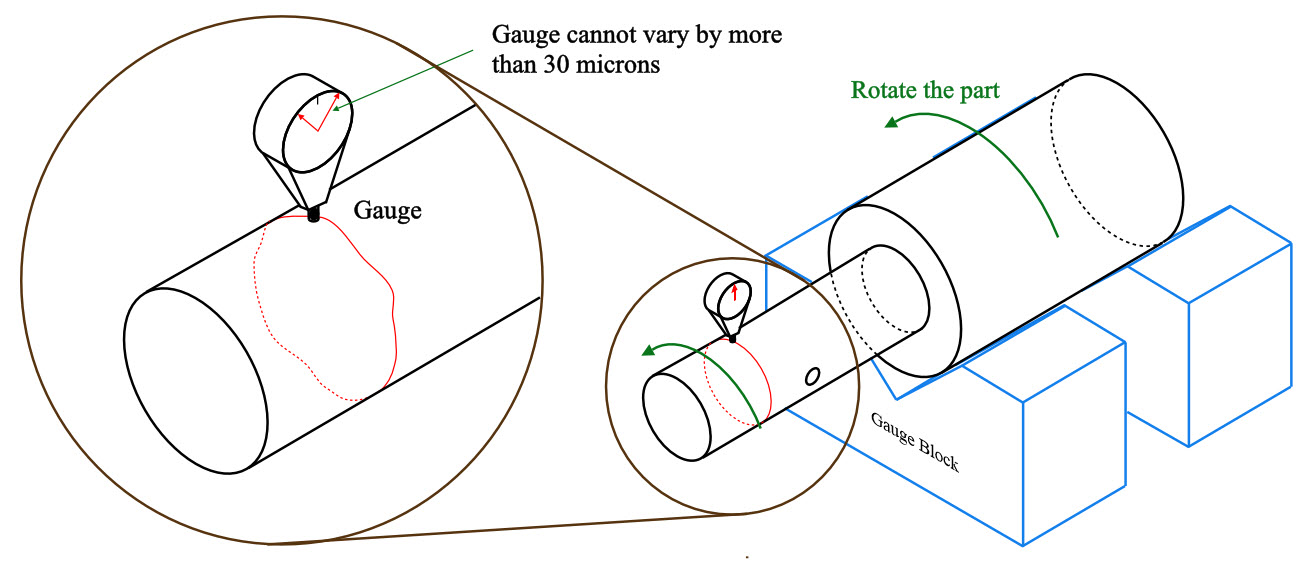
Runout is measured using a simple height gage on the reference surface. The datum axis is controlled by fixing all datum points and rotating the central datum axis. The part is usually constrained with V-blocks, or a spindle, on each datum that is required to be controlled. The part is then rotated around this axis and the variation is measured using the height gage held perpendicular to the part surface. As long as the gage does not vary by more than the runout tolerance, the part is in spec.

Relation to Other GD&T Symbols:
A great way to relate this symbol to others is through this equation:
Circular Runout = Concentricity (axis offset) + total Circularity (out of round)
Runout captures both of these in a single measurement when you are comparing the surface to another datum.
Runout can also be constrained using a face as well as another circular surface. If this is the case the perpendicularity of the datum face to the reference surface can add into the runout of the surface as well, since if the part is tilted at an angle, the part would runout higher due to the tilting of the part.
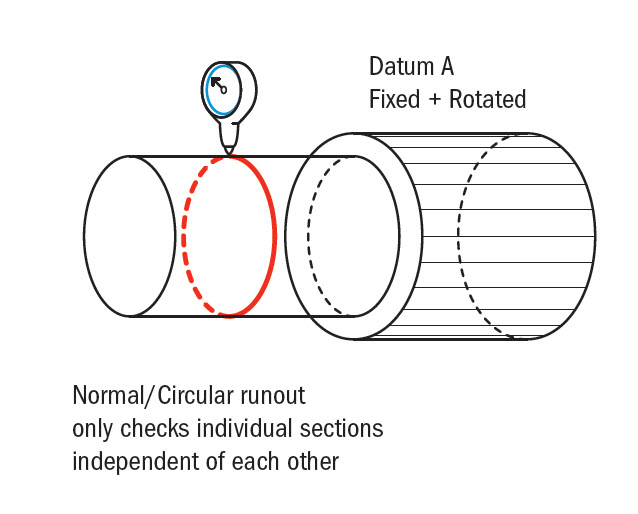
Runout is the 2D version of total runout. While it is measured in individual cross-sections, total runout takes the measurement around and across the surface of the entire part in a 3D tolerance zone.
When Used:
Runout and its 3D component, Total runout, are very common symbols in GD&T due to the control they have on a rotating part. They are used in any rotating components such as drills, gears, shafts, axles, and many machine tool parts. The automotive and industrial industry uses this GD&T symbol very often on any part that is rotated. Runout usually is put into place when oscillations or vibrations need to be controlled on a fast rotating part, like an engine or transmission. If the part rotates it probably requires runout.
Example:
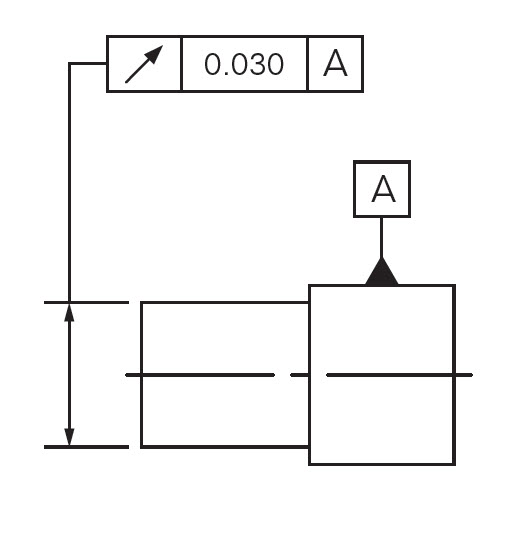
A shaft that is rotated at very high speeds is prone to oscillations if the right edge of the shaft is too far offset from the left side. To control how much wobble this part will have runout is used to ensure that the smaller diameter surface is relatively controlled to datum surface A. To control this without Geometric Dimensioning and Tolerancing would be nearly impossible. The small amount of variation in the shaft, straightness of the shaft, and roundness of the individual surfaces would be unrealistic to control. With runout, you have your final rotational condition that you want controlled without needing to specify unnecessary tight control on the entire part.
The best way to constrain this part is with GD&T
By constraining with runout as shown on the drawing you are ensuring that when the shaft rotating, with datum A fixed in housing, the reference surface will not go outside of a perfect central rotation by more than 30 microns. This will ensure that only a limited vibration is made and that both parts will wear evenly. To ensure this condition is met, you must measure the parts with a gage.
B is now controlled in relation to A, ensuring a smooth, near-perfect rotational system. Note: this runout must be controlled on any cross-section along the reference surface. You must gage each cross-section separately though (Gaging the entire cylinder at once would be total runout).
Final Notes to Remember:
Circular Name:
Runout as a GD&T symbol is often referred to as circular runout to differentiate it from total runout.
Two similar versions
Runout is a relation of surface to datum surface or surface to datum axis. When the datum is a surface, any out of round on the datum surface can impact the runout of the part, depending on if the high and low spots on the datum correspond to the high and low spots on the reference feature. (Remember relating the axis to a datum axis is Concentricity)
Regardless of Feature Size
Runout is always RFS (regardless of feature size) meaning that the boundary formed by the dimensions is the entire part envelope that the part can exist regardless of how large the tolerance is. No MMC or bonus tolerance is ever used with it.


