Radius
Symbol: R
Definition:
The Radius symbol is used to indicate that the size of a circular feature is being dimensioned using the radius length, which is half of the diameter length. Because a circle can be dimensioned using its full diameter or radius, the diameter or radius symbol MUST be indicated on the dimension so there is no confusion over the size of the feature.
Application:
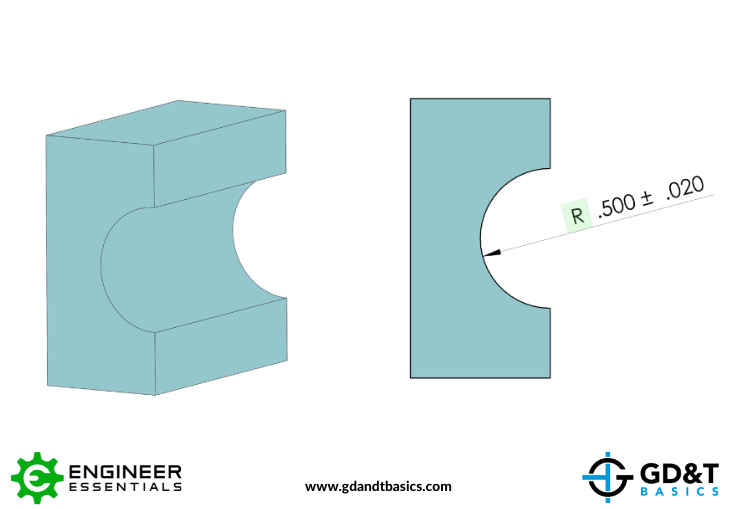
When dimensioning a circular feature using its radius, the radius symbol, “R,” is placed before the size dimension as shown below.

Figure 1: Circular Feature with Radius Dimension
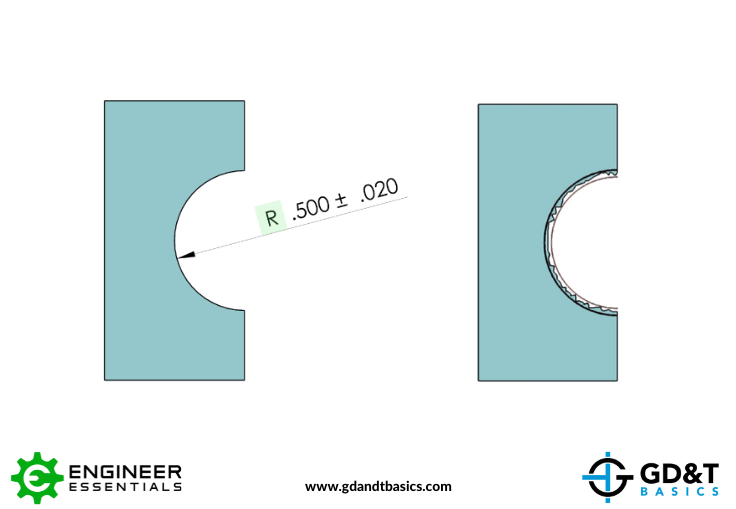
The tolerance listed with the radial dimension gives the maximum and minimum acceptable radii for this feature, creating the radial tolerance zone. As long as all measurements along the surface fall within the tolerance zone, the part is acceptable. As you can see in Figure 2, the resulting surface of the curve is not required to be smooth, as long as all points fall within the tolerance zone.

Figure 2: Machined Radius within Tolerance Zone

