Profile of a Surface
GD&T Symbol: 
Relative to Datum: Optional
MMC or LMC applicable: No
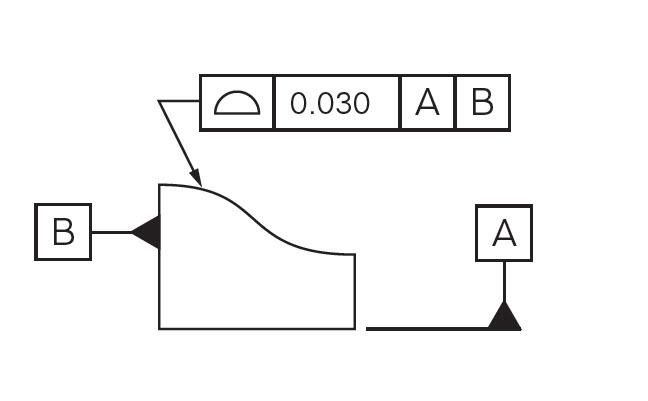
Drawing Callout:

Description:
Profile of a surface describes a 3-Dimensional tolerance zone around a surface, usually which is an advanced curve or shape. If it is called out on a curved surface, like a fillet on a welded part, the entire surface where the radius is has to fall within the tolerance zone. Profile controls all the points along the surface within a tolerance range that directly mimics the designed profile. Any point on the surface would not be able to vary inside or outside by more than the surface profile tolerance. Usually, when surface profile is required, there are no tolerances on the dimensions that describe the surface and use the GD&T callout to give the acceptable range.
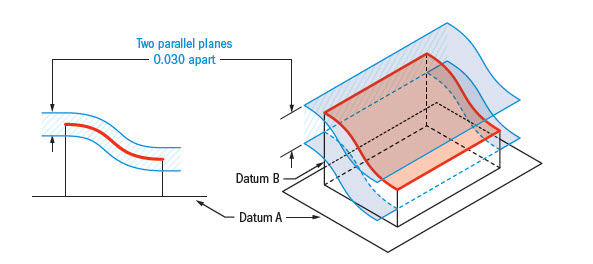
GD&T Tolerance Zone:
3-Dimensional tolerance zone existing of 2 parallel surface curves that follow the contour of the surface profile across the entire length of the surface. This tolerance zone may or may not be referenced by a datum.

Gauging / Measurement:
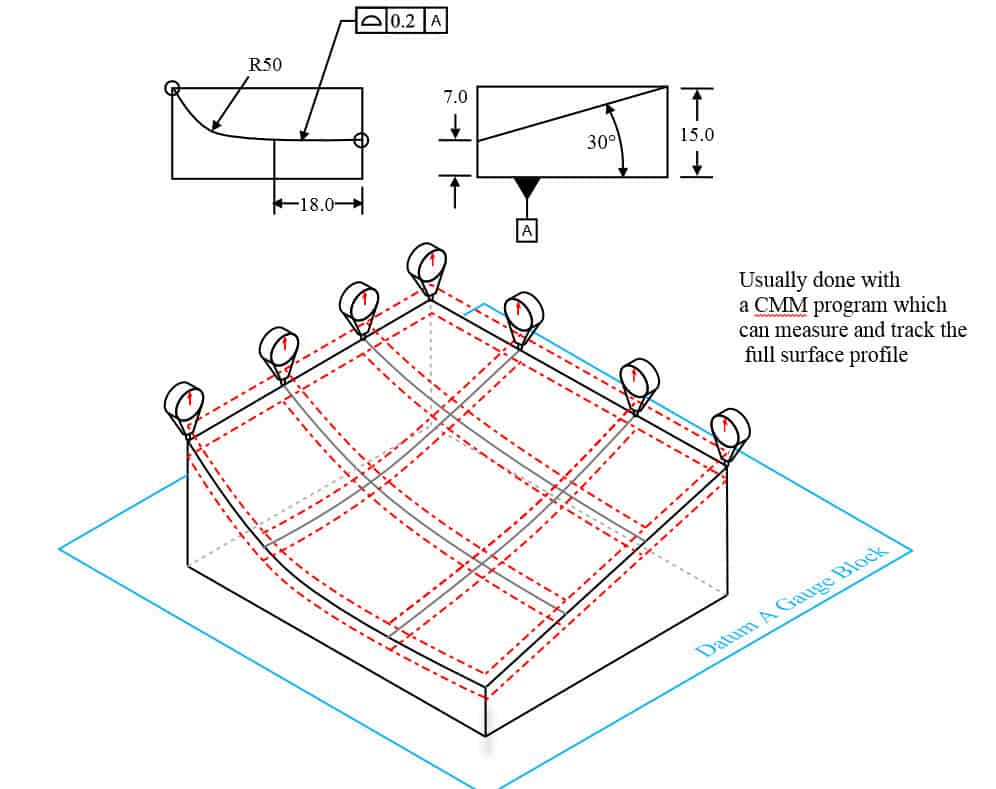
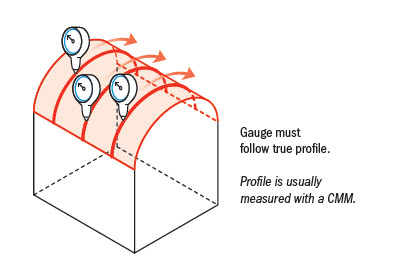
Profile is usually measured using a CMM due to the complexity of some of the surfaces that are called out. The CMM would compare the 3D scan of the profile to the dimensions called out on the drawing to see if it was in spec. If a simple surface is called out, such as a radius on a corner, a height gauge can be used to trace the part as long as the gauge can stay the same distance away from the surface as rotates around the surface.
Relation to Other GD&T Symbols:
Profile of a surface is the 3D version of profile of a line. The difference between them is that profile of a surface would cover the entire required surface, making sure that every point falls in the tolerance zone, not just at a cross-section.
When used without datums, Profile of a line can also be thought to be similar to flatness or cylindricity as these symbols are only more specific versions of the profile of a surface symbol. When used with datums, profile can mimic all the orientation symbols (perpendicularity, parallelism, angularity) and even control the location and size of a feature or surface. All of these tolerance symbols specify how much a surface of any geometric shape can vary from its true form. All of these symbols have a tolerance zone existing of parallel surfaces surrounding the measured profile.
When Used:
Profile is the catch-all symbol for surface control in Geometric Dimensioning and Tolerancing. If it cannot be controlled with another symbol, profile is your best bet. When used with datums it can control every aspect of a feature’s geometry which includes size, location, orientation, and form.
Profile of a surface can be used for advanced curved surfaces, such as when a surface curves in multiple axes at once. Commonly, casted parts call out surface profile when the surface is curved to control the amount of variation. Other uses could be an airplane wing, complex surfacing designs in automotive engineering, each requiring to fit between two parallel surfaces of the same shape to ensure the profiles are always consistent. Both profile of a line or profile of a surface can be called out on such surfaces, however, surface profile is more common.
Example:
If you have a curved surface and want to ensure that every point falls within a specific tolerance range, you would call out profile of a surface.
This could be considered an advanced curve that could only be controlled with the use of a profile tolerance. The entire surface  would have to be measured, usually with a CMM and then determined if the whole surface falls between the tolerance zones. Note: Profile only controls the variance of the points in relationship to each other along the surface, similar to the flatness tolerance.
Final Notes to Remember:
Used with Surface Profile
Sometimes profile of a line is used in conjunction with profile of a surface. In these cases, the line profile tolerance will be tighter than the surface tolerance. This ensures that along any specific cross-section of the profile, the part will be tightly controlled, while at a looser extent, the total profile is also controlled.


