Profile of a Line
GD&T Symbol: 
Relative to Datum: Optional
MMC or LMC applicable: No
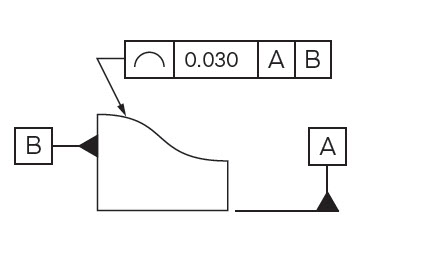
Drawing Callout:

Description:
Profile of a line describes a tolerance zone around any line in any feature, usually of a curved shape. Profile of a line is a 2-Dimensional tolerance range that can be applied to any linear tolerance. If it is called out on a surface, like a radius on a part – profile of a line would specify how much that cross-section could vary from a true curved radius. Profile of a line takes a cross section at any point along the surface and sets a tolerance zone on either side of the profile. The profile of a line callout can also be set with an all-around leader or given a specific range (see example).
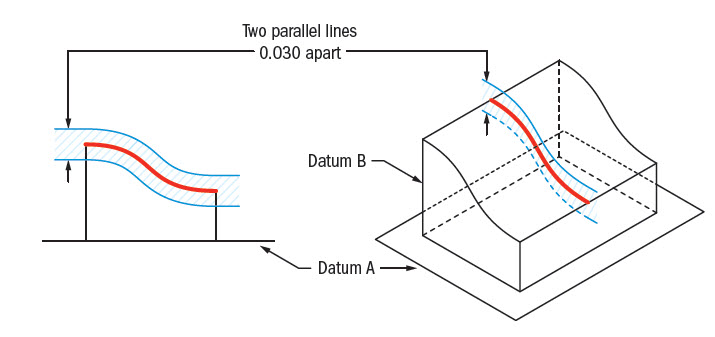
GD&T Tolerance Zone:
2-Dimensional tolerance zone existing of two parallel curves that follow the contour of the true surface profile. The application on where the tolerance zone applies can be specified on the drawing. This tolerance zone may or may not be referenced by a datum.

Gauging / Measurement:
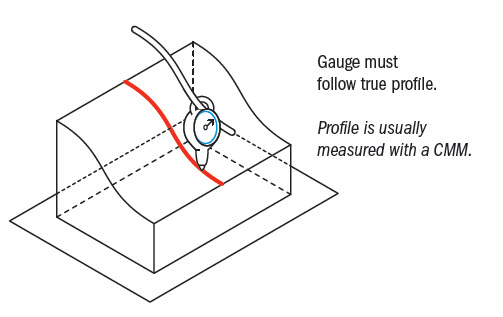
Profile of a line is measured using a gauge that is referenced to the true profile at the given specific cross-section. Because there are an infinite amount of 2D cross-sections of any part, the number or locations of measurement points can be specified on the drawing. Profile is usually measured using a CMM for more complex geometries.

Relation to Other GD&T Symbols:
Profile of a line is of course closely related to profile of a surface. The difference being that profile of a line takes only the measurement at a specific cross-section and does not take into account the variance of one cross-section to the next.
Profile of a line can also be thought to be similar to straightness or circularity. All three tolerance symbols specify how much a cross-section can vary whether in a straight line, a circle or in a custom profile shape. They all have a tolerance zone existing of parallel lines surrounding the measured profile in a 2-Dimensional cross-section.
When Used:
Profile of a line is used for advanced curved surfaces, such as when a feature curves in multiple axes at once. A common use of line profile would be if you were comparing a curving surface such as the hood of a car, or an airplane wing. With an airplane wing, each cross-section would need to be a different profile shape and require multiple measurements to ensure at each location the profile tolerance is met. Both profiles of a line or profile of a surface can be called out on such surfaces.
Example:
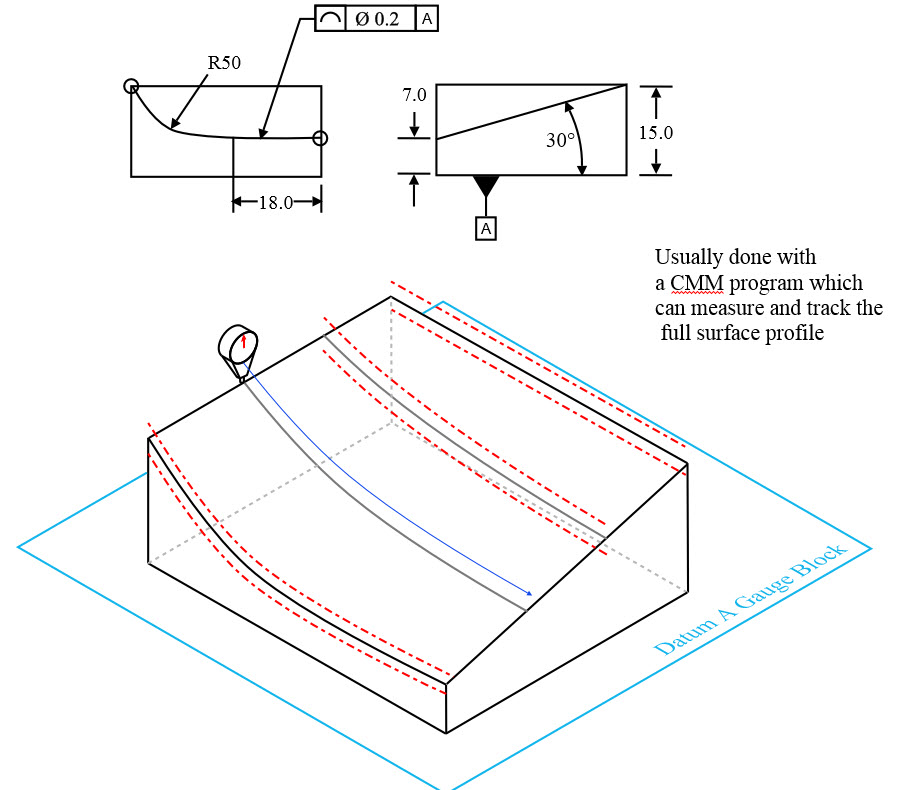
If you have a curved surface that would need to be in specification along all of its cross-sections as shown below.
This could be considered an advanced curve that could only be controlled with the use of a profile tolerance if required. The part is only measured from point C to D for each cross-section.
Note: The profile of a line tolerance does not control the specific dimension that every surface point is located – that is done by the dimensions of the part. It only controls how tightly the points fall into a “true” curve, similar to the circularity tolerance.
Final Notes to Remember:
Used with Surface Profile:
Sometimes profile of a line is used in conjunction with profile of a surface. In these cases, the line profile tolerance will be tighter than the surface tolerance. This ensures that along any specific cross section of the profile, the profile remains true, while also ensuring that each cross section of the part would be within a wider tolerance range when compared together.


