Maximum Material Condition (MMC)
Symbol:
Category: Feature of Size
Definition:
Maximum Material Condition or for short, MMC, is a feature of size symbol that describes the condition of a feature or part where the maximum amount of material (volume/size) exists within its dimensional tolerance. The callout also removes GD&T Rule#2 which states that all geometry tolerances are controlled independently of the feature size.
When you have a feature that Geometric Dimensioning and Tolerancing is called on:
If it is a hole or internal feature: MMC = smallest hole size
If it is a pin or external feature: MMC = largest size of the pin
In each of these cases, the part will have the maximum amount of material that would be allowed within the part tolerances.
Max Material Condition is one of the dimensional limits on a part. The other side of the tolerance range would be the Least Material Condition.
The only GD&T Symbols where Max Material Condition can be applied are:
- Straightness (axis)
- Parallelism
- Perpendicularity
- Angularity
- True Position – very common
Reason for Use:
If you want to ensure that two parts never interfere, or limit the amount of interference between the parts when they are at their worst tolerances, MMC can be called out. Take a shaft that must go through a hole with clearance between the two.
The MMC of the shaft would be the Maximum diameter
The MMC of the hole would be its Minimum diameter
If you made sure that the MMC of the shaft was always smaller than the MMC of the hole, you guarantee there will always be clearance between the parts. This is important for any tolerance stack to ensure that when the tolerances are at their least desirable condition, the part still functions properly.
Gauging Max Material Condition:
Maximum material condition comes in handy when it comes to making a functional gauge for the part. If you want to limit the size of your feature, you can specify the max material condition call out additionally control it with Geometric Dimensioning and Tolerancing.
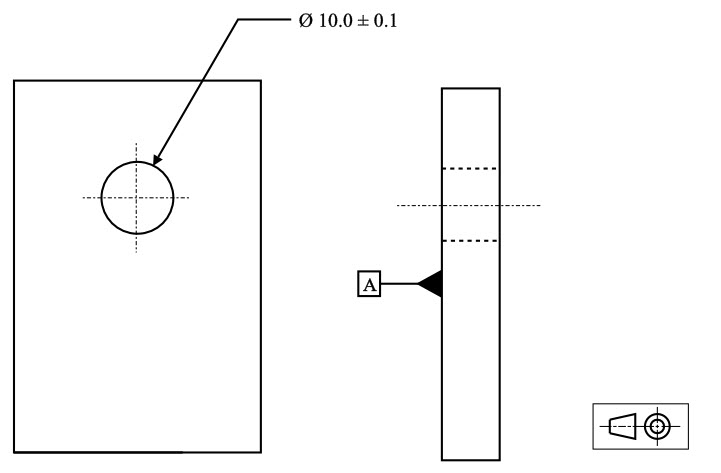
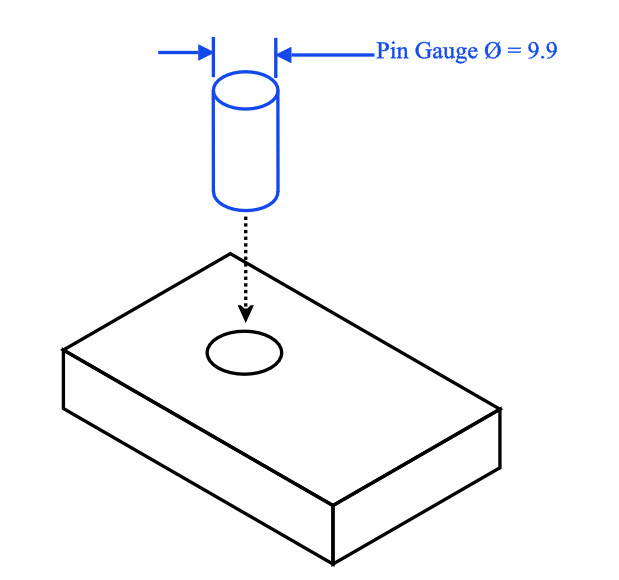
For example if you wanted to ensure that a pin always fits into a hole when the hole is at MMC, we could design a pin gauge that
mimics the lower limit of the hole. The gauge that controls the Max Material Condition of a part is called a Go-Gauge (Meaning the Part must always Go into it)
The Go-Gauge for a hole or internal feature would exist of a pin that is just a tiny bit (few microns) smaller than the Maximum Material Condition of the hole. The gauge pin would then be inserted into the hole and as long as the pin Goes into the hole, the part is in spec.
(Note: The pin gauge may be made slightly smaller (a few microns) than the MMC to account for any straightness or tolerance issues that may be inherent in producing the gauge)
*Remember when no GD&T is called on the hole the envelope principal applies – meaning the geometric and size effects of the hole cannot be larger or smaller than the tolerances specified.
Combination Gauging with GD&T Symbols
The true benefit of using the maximum material condition on a feature is the ability to call out GD&T with dimensional tolerances and be able to gauge for them at the same time. When geometric control and material control are used together, they form the true maximum envelope or virtual condition that the part can be in and still be to specification.
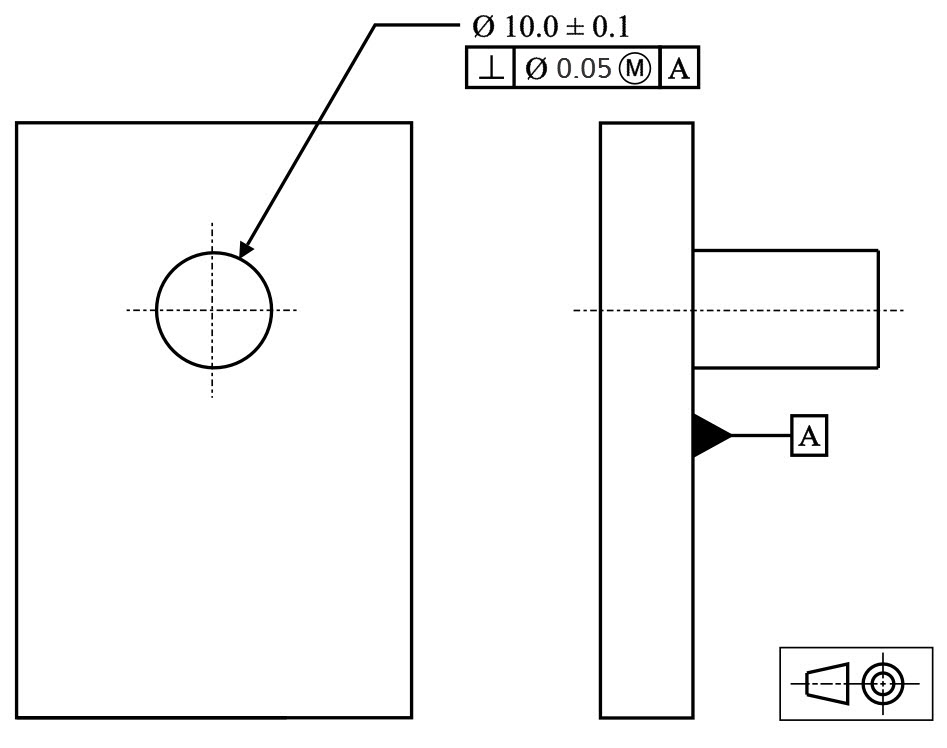
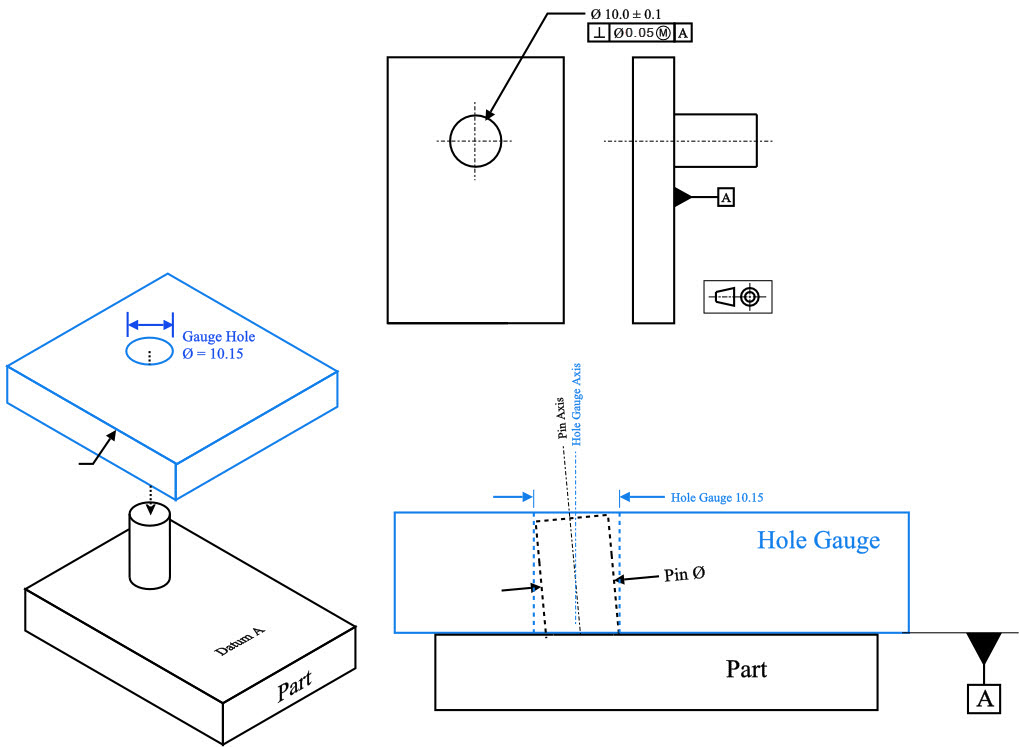
For example, you have a pin with a dimensional and perpendicularity call outs. The pin needs to be within both perpendicular enough and small enough so that it doesn’t get stuck when inserted into its mating hole at a 90° angle to the face of the part. In this case all you really care about is the pin fits into the hole at the worst case limits (MMC and max perpendicularity tolerance make up the maximum envelope of the part)
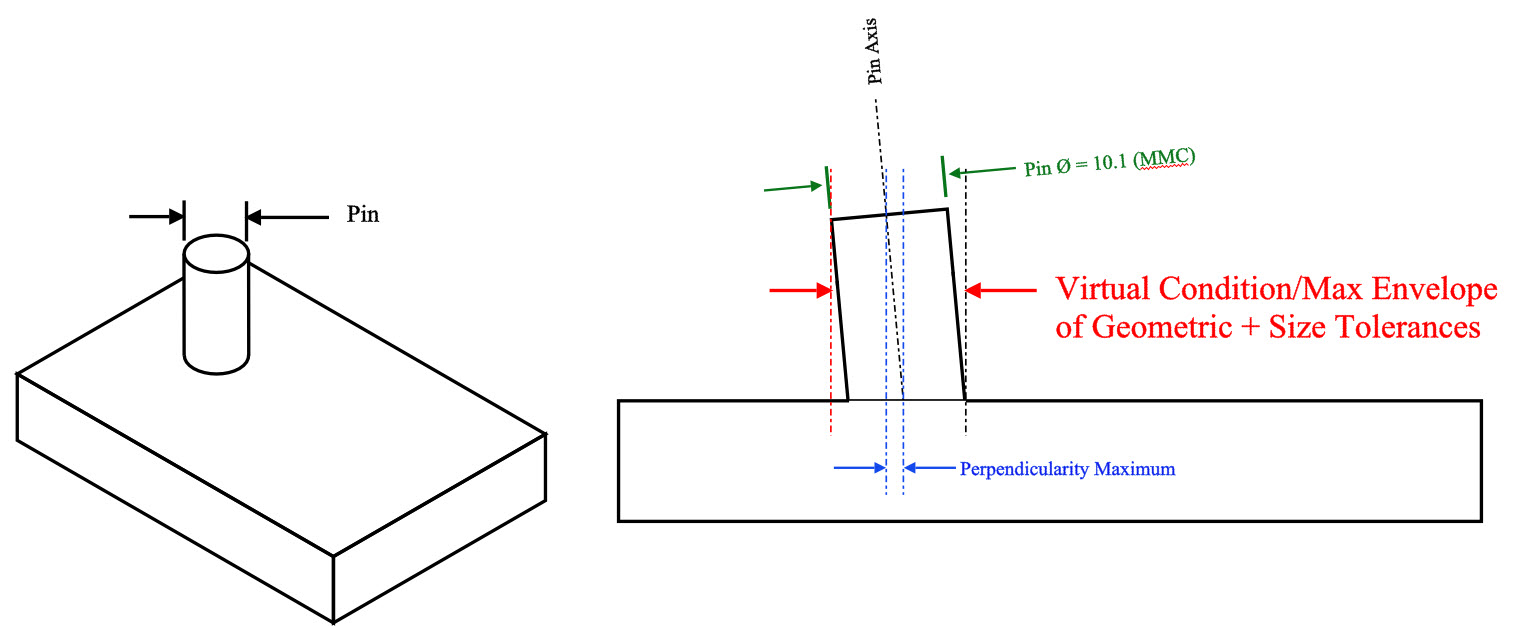
The virtual condition can be controlled with a functional gauge. Functional gauges can be a huge benefit to production environments where measuring on the line quickly is critical.
Gauging for MMC with Geometric tolerances:
For the Gauging of a hole with perpendicularity call out:
Gauge Ø (pin gauge)=Min Ø of hole (MMC)–GD&T Symbol Tolerance
For Gauging of a pin with a perpendicularity callout:
Gauge Ø (hole gauge) = Max Ø of pin (MMC) + GD&T Symbol Tolerance
Note on Bonus Tolerance:
When a functional gauge is used for Perpendicularity, any difference the actual feature size is from the maximum material condition would be a bonus tolerance. The goal of a maximum material condition callout is to ensure that when the part is in its worst tolerances, the Perpendicularity and size of the hole/pin will always assemble together. This means that if you make a pin smaller, you make more bonus tolerance for yourself. This bonus can be added to the GD&T tolerance and would widen the perpendicularity tolerance.
Bonus Tolerance = Difference between MMC & Actual condition
Final Notes:
Features of Size:
Maximum Material Condition is one of three features of size callouts in GD&T. The other two are Least Material Condition and Regardless of Feature Size. All of these specify the condition that the part or feature must be in to apply the specified geometric tolerance.
Default to Regardless of feature size
When there is not call out to Maximum Material Condition or Least Material Condition, the part, by default, is measured regardless of feature size (RFS). This means there is no bonus tolerance and the envelope of the part is not defined. The part must be controlled geometrically regardless of what size the feature is at.

