Concentricity
GD&T Symbol: 
Note: Concentricity was removed from the 2018 ASME Y14.5 standard. It is still commonly in use for those on previous versions of the standard.
Learn more about changes to the 2018 ASME Y14.5 standard.
Relative to Datum: Yes
MMC or LMC applicable: No*
* In the ISO Standards, MMC is allowed with concentricity and symmetry
Drawing Callout:
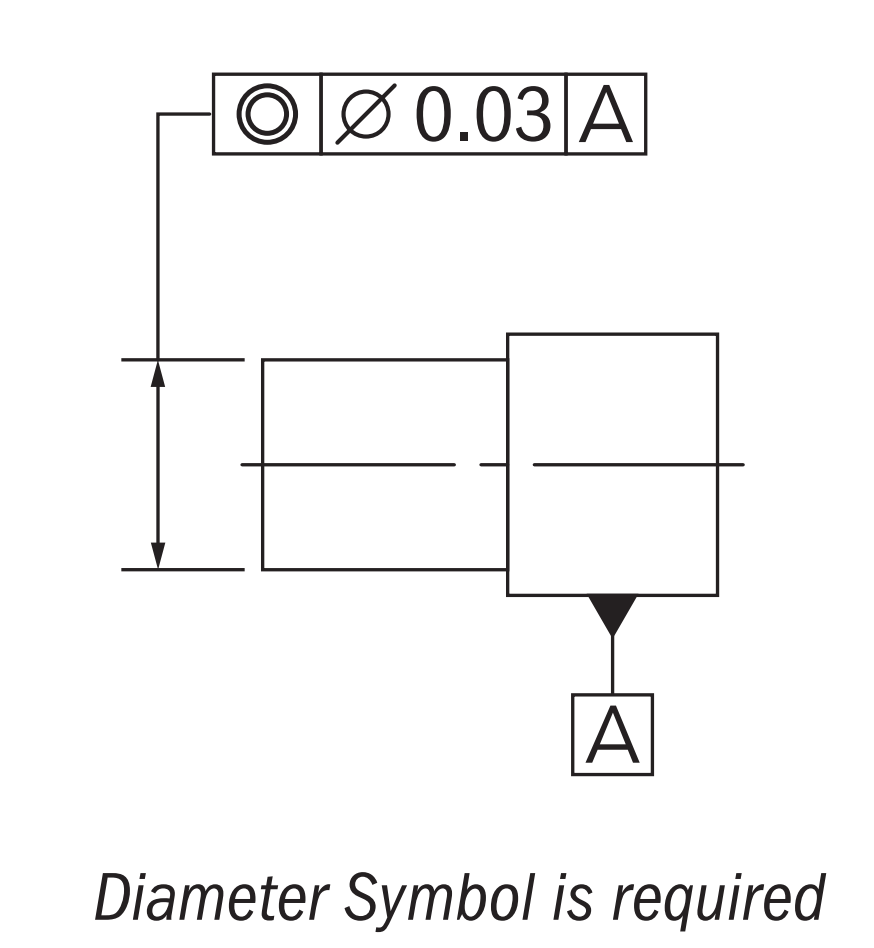
Description:
Concentricity, (called coaxiality in the ISO Standard), is a tolerance that controls the central derived median points of the referenced feature, to a datum axis. Concentricity is a very complex feature because it relies on measurements from derived median points as opposed to a surface or feature’s axis.
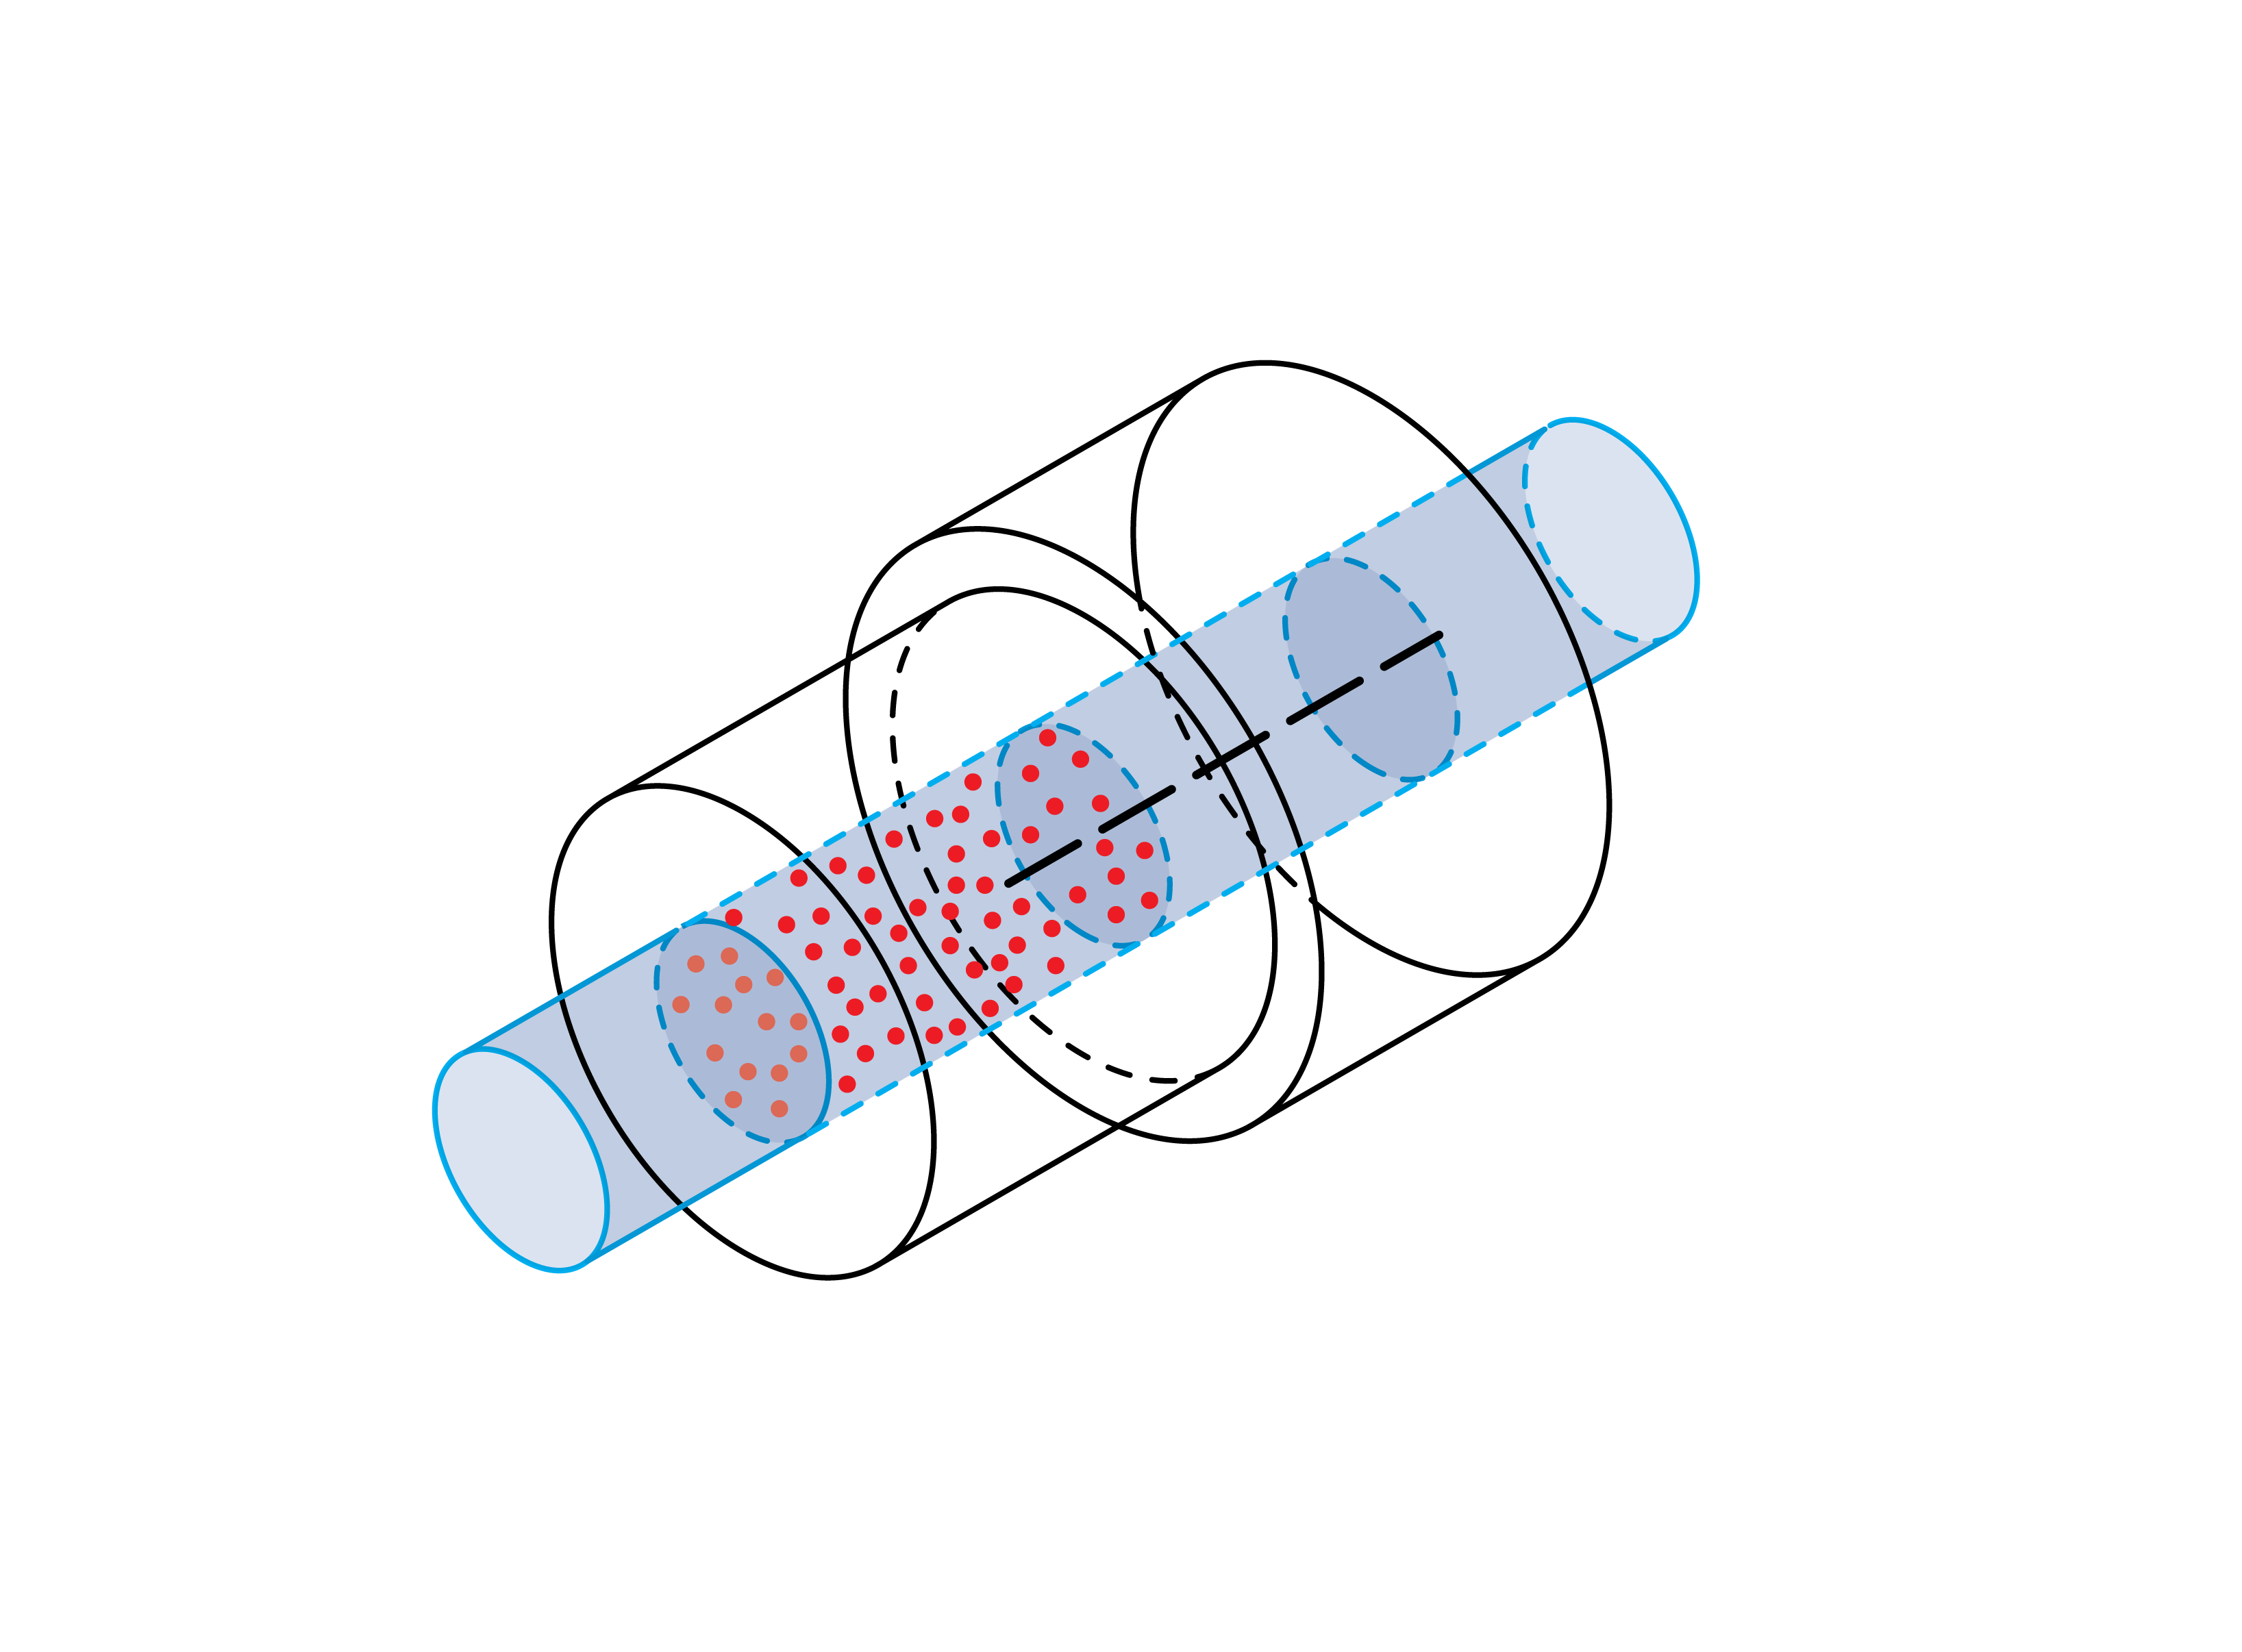
GD&T Tolerance Zone:
Concentricity is a 3-Dimensional cylindrical tolerance zone that is defined by a datum axis where all the derived median points of a referenced cylindrical feature must fall within. All median points along the entire feature must be in this tolerance zone.
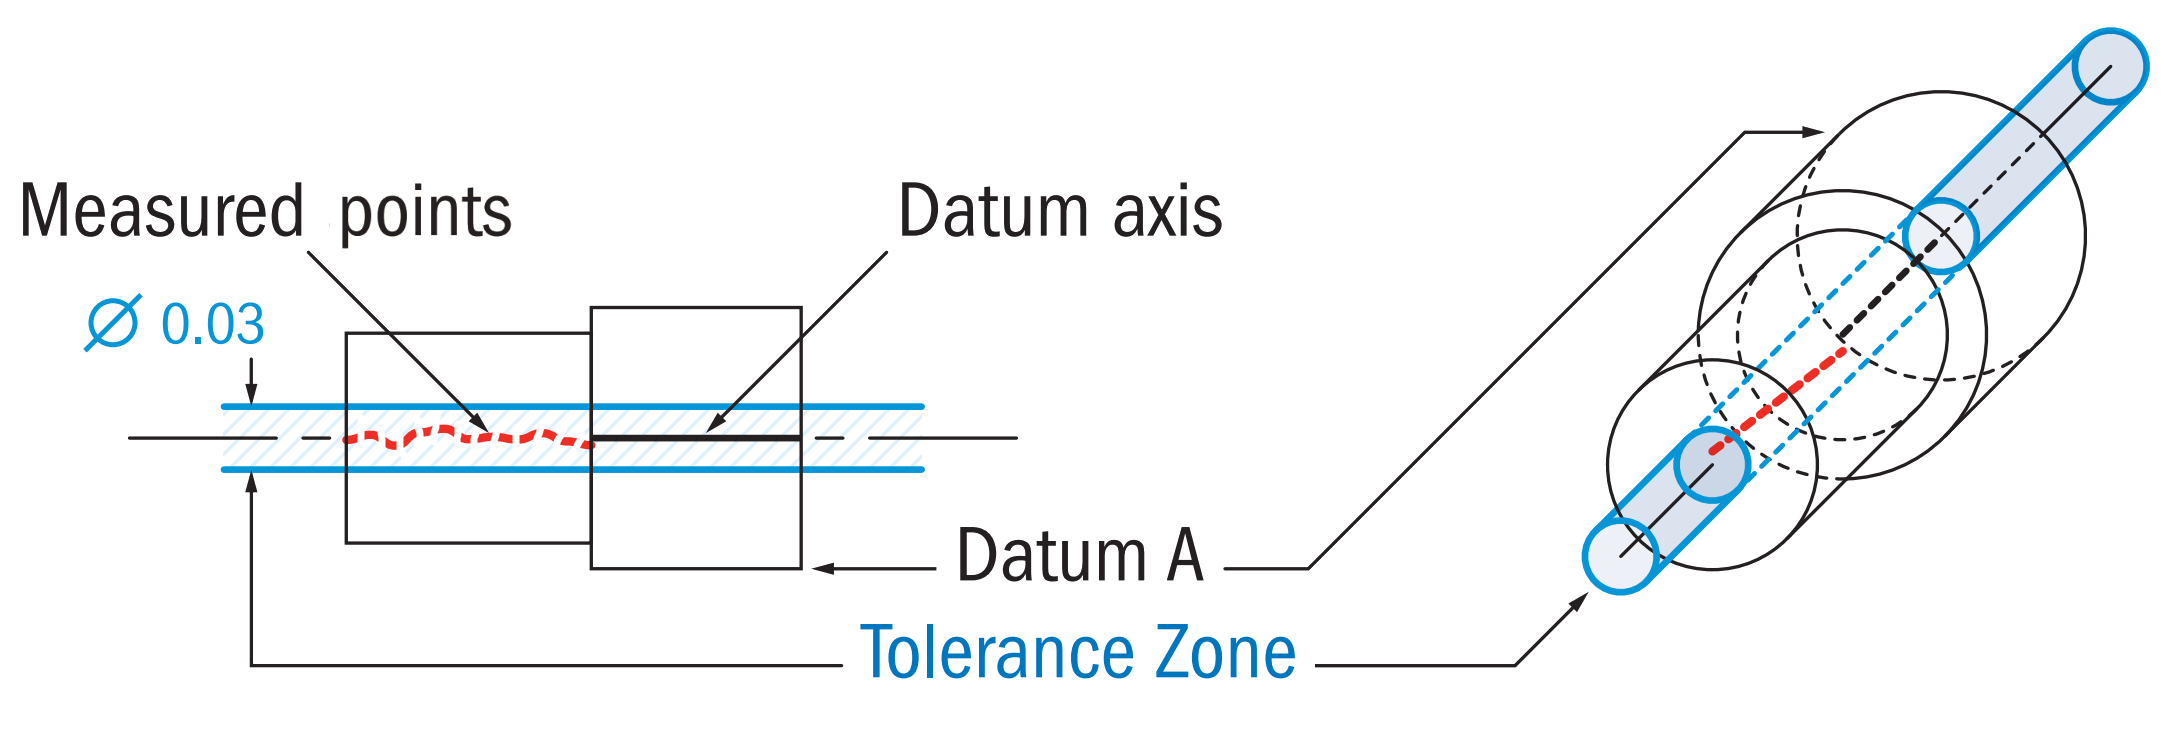
Gauging / Measurement:
Concentricity is considered one of the most difficult Geometric Dimensioning and Tolerancing symbols to measure, due to its difficulty in establishing the midpoints of the feature. First, you must establish a datum axis which to measure, Once the datum axis is established you must now take measure many a series of cross-sections (however many is realistic) to establish “diametrically opposed” (surface points directly opposite from each other across the diameter) surface points. The median points of these diametrically opposed surface points must then be mapped out for the entire feature. Finally, these points are compared to the tolerance zone established by the datum axis. This can only be done on a CMM or other computer measurement device and is quite time-consuming.
Relation to Other GD&T Symbols:
Concentricity is considered the “circular” form of GD&T symmetry. Both tolerances measure derived median points compared to a datum plane/axis and are notoriously difficult to measure.
Runout is a combination control that can indirectly control concentricity and circularity simultaneously.
e.g. If a part is perfectly round (perfect circularity), the runout measurement will equal the concentricity, if the part is perfectly centered (perfect concentricity) the runout will equal the circularity.
Concentricity is similar to position, however is not the same. While Concentricity controls the derived median points (imperfect and scattered) of surface elements, position will control the axis (perfectly straight) of the feature.
When Used:
Due to its complex nature, Concentricity is usually reserved for parts that require a high degree of precision to function properly. Transmission gears, which need to always be coaxial to avoid oscillations and wear, may require concentricity to ensure all the axes line up correctly. Equal mass or inertial concerns are one of the leading causes for the concentricity callout, however are often better designed with runout. In fact, in most cases, the use of runout or position should replace the need for concentricity and be much easier to measure.
Example:
An intermediate shaft in a transmission is composed of two different cylindrical sections which are coaxial. Datum A (right) is the drive side and relatively fixed with bearings to the housing, The referenced surface B is desired to be concentric with Datum A to avoid oscillations at high speed.
Two gears with the concentricity callout.
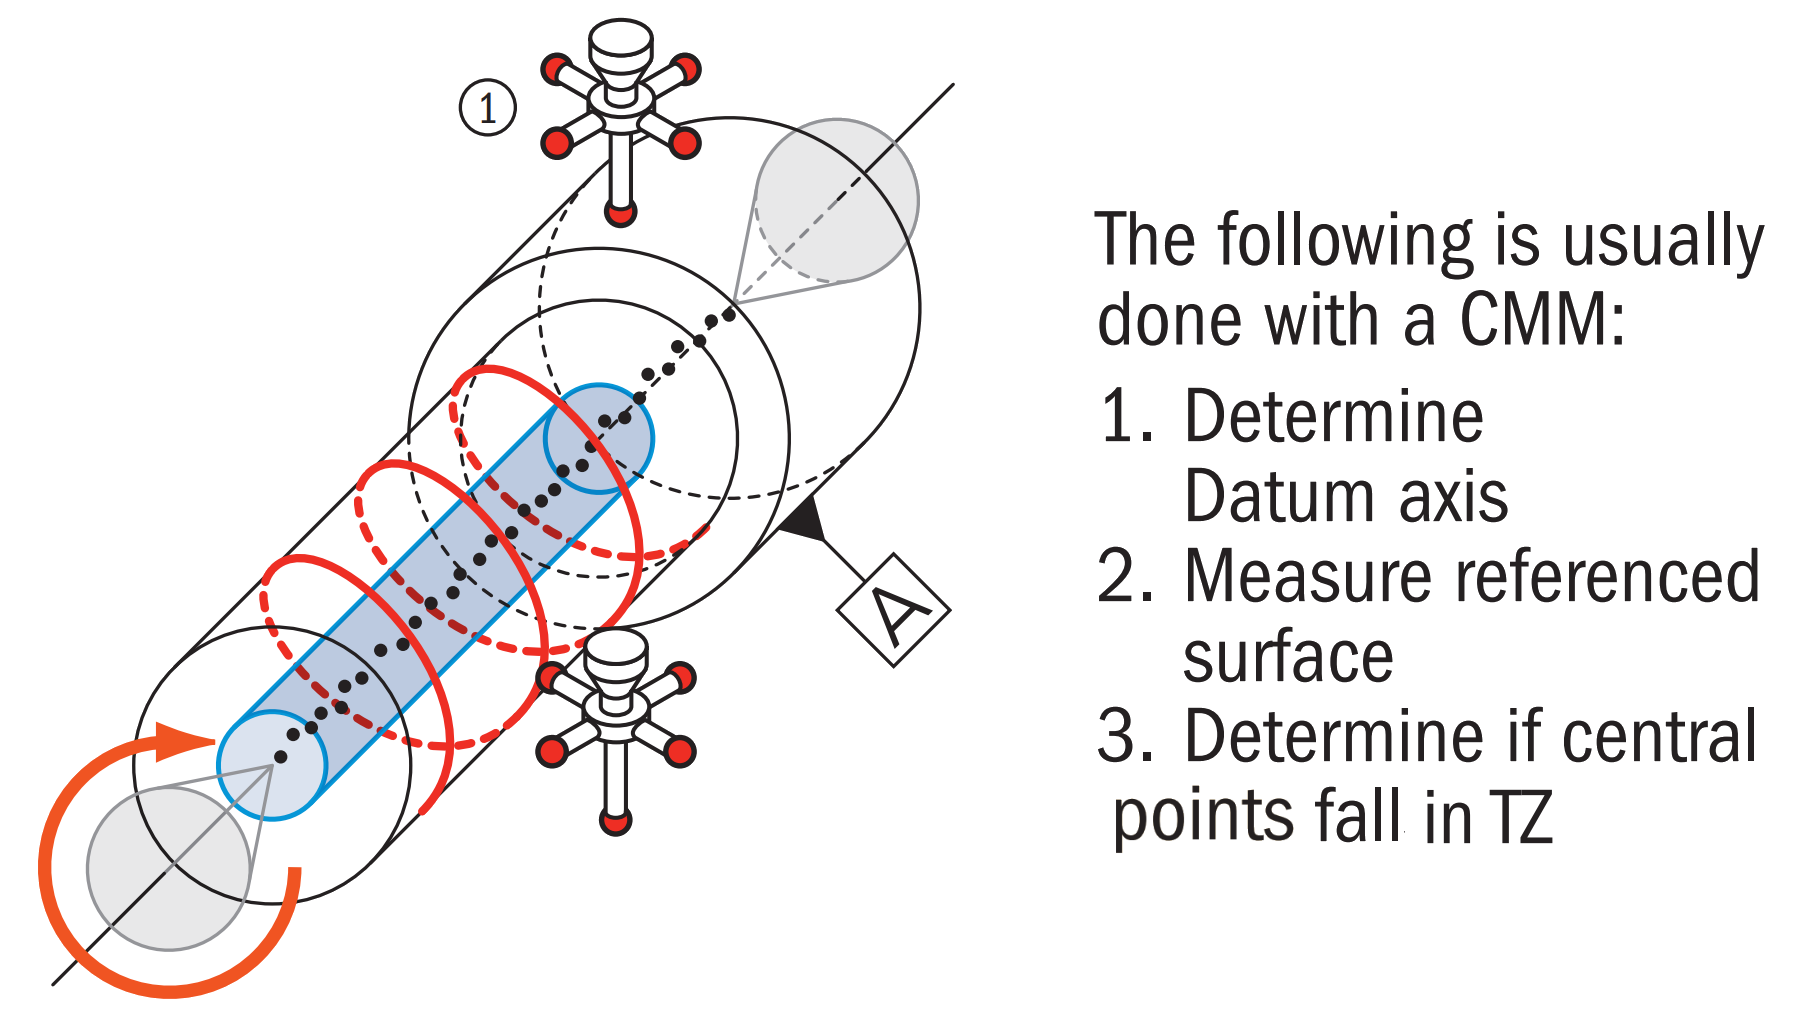
Concentricity would require side B to be measured in all dimensions several times to obtain a full dimensional scan of the surface of the reference feature. This scan must then be analyzed to determine the derived median points at each location along the cylinder fall within the tolerance zone. The tolerance zone would be established by the datum axis derived from datum feature A. All central points would all need to fall into the cylindrical tolerance zone to be in tolerance. This would all be done with a CMM and measurement software and required special measurement programs to compare the axes.
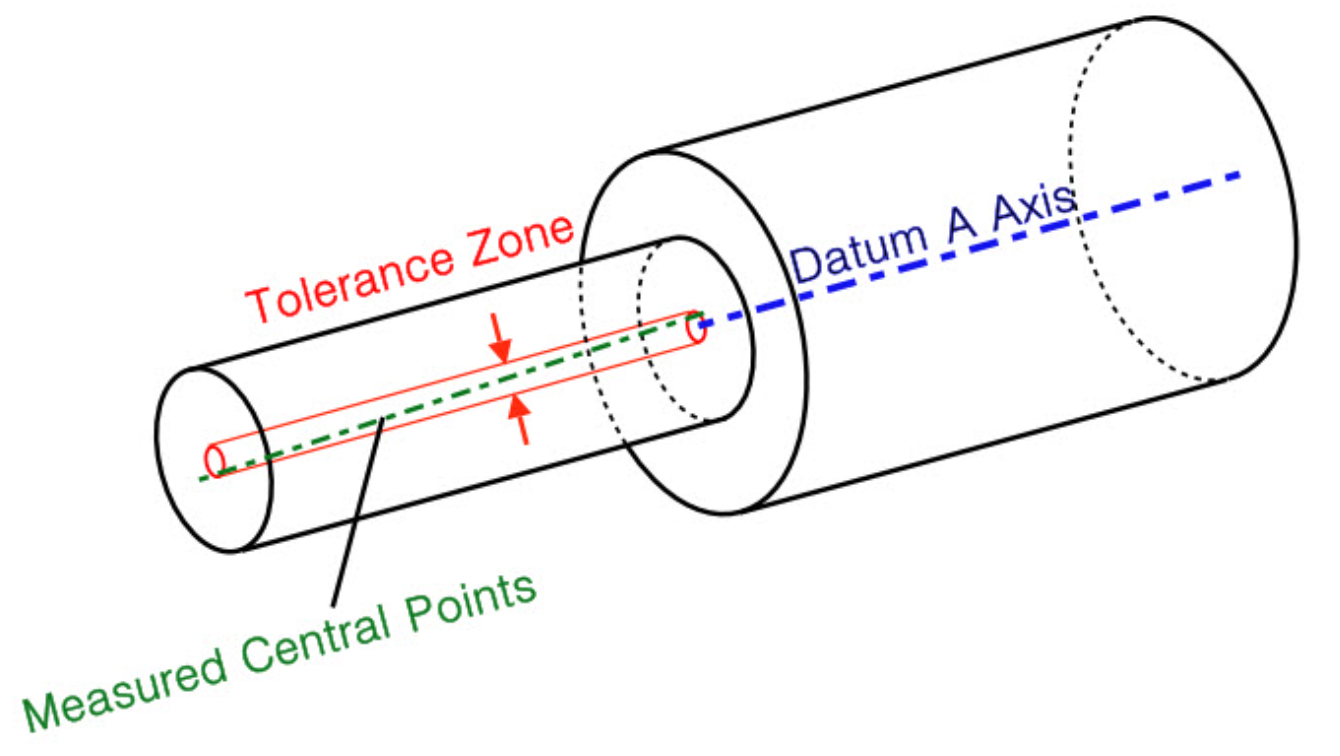
In this example, the measured derived median points (green) all fall within the cylindrical tolerance zone surrounding datum axis A, ensuring a smooth, near-perfect rotational system. Note that the derived median points do not need to form a straight line and may be scattered due to imperfections in the surface. However, as long as they all fall within the tolerance zone the part is in spec.
Final Notes to Remember:
Avoid Concentricity!
You will always hear from most machinists, measurement techs, and designers to avoid concentricity like the plague. Unless it is absolutely necessary to control the distribution of mass around a part’s median points you should look to other more applicable GD&T symbols. A good replacement for concentricity is Circular Runout or Total Runout since they compare the actual surface of a feature to a tolerance zone, while concentricity relates the derived median points of the surface to a tolerance zone. You can physically touch and measure the surface of the part to obtain a runout measurement. Controlling runout will also control the concentricity to the same extent. (Runout = Concentricity + Circularity)
Use in Ammunition Measurement
Often you will see “concentricity gauges” that are applied to homemade bullet casings. These gauges, however, do not measure concentricity but instead are measuring runout. However, since runout is just a combination of circularity and concentricity, you can technically say that you are measuring the concentricity as well indirectly.


