Arc Length
Symbol: 
Definition:
The Arc Length symbol, also known as the Arc Modifying symbol, is placed above a value to indicate that the arc’s length is being dimensioned on a curved outline.
Application:
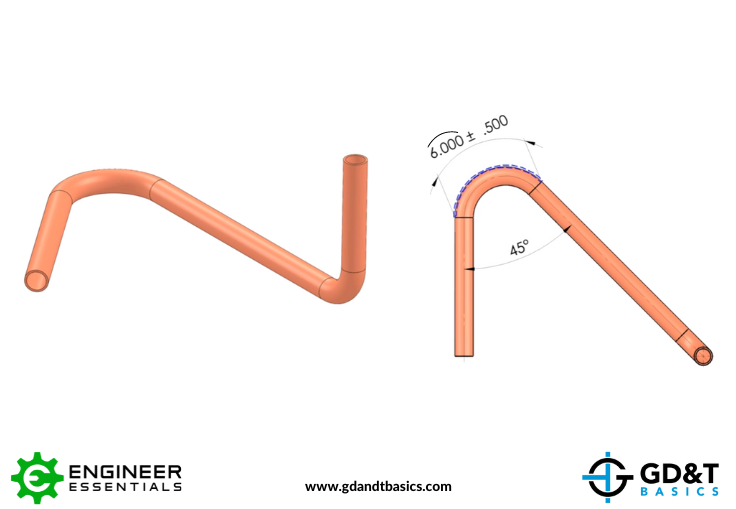
By default, and if the ASME Y14.5 standard is being used on your print, the value for the arc length dimension applies to the surface nearest the dimension, unless otherwise specified. This is illustrated in the figure below of the pipe model. The arc length dimension in this model is shown to be 6.000 +/-.500. We have placed a blue dashed line on this model to illustrate where this dimension applies, by default. As you can see, the surface closest to the dimension is the outer curve of the pipe. Therefore, the arc length value of 6.000 +/-.500 is the required arc length as measured on the outer surface of the bend in the pipe.

One thing to note – it is fairly common to see the arc length dimension applied to the centerline of the part in industries that deal a lot with pipe bending. If arc length is being measured from the centerline, rather than the closest surface to the dimension value, this must be specified on the drawing.

